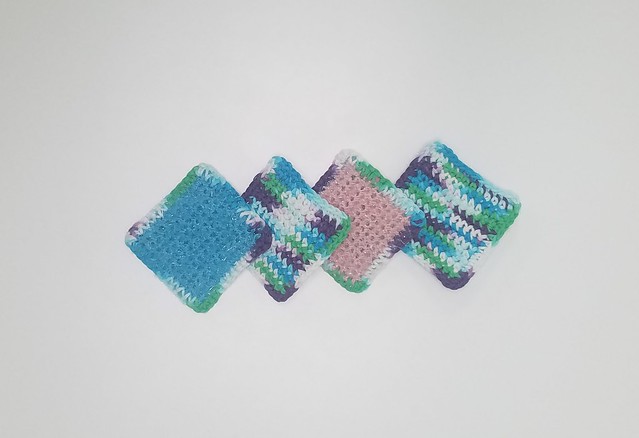
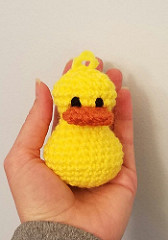
Double Sided Kitchen Scrubby – Free Pattern

I love quick and easy projects. These scrubbies would be great to sell at craft shows or to give as gifts. They work up in no time at all and take very little yarn, so they are great for scraps.

Materials:
Cotton yarn (I used Bernat Handicrafter Cotton in Squishy)
Red Heart Scrubby Sparkle Yarn
Size H 5.0mm Hook
Size I 5.5mm Hook
Yarn Needle

Stitches/Abbreviations:
CH – chain
SC – single crochet

Pattern Instructions:

Square #1:
Using Scrubby Sparkle yarn and the I 5.5mm hook, ch 13
Row 1: sc in the 2nd ch from hook and across the row (12 stitches)
Rows 2-12: sc across
Fasten off and weave in ends

Square #2:
Using cotton yarn and the H 5.0mm hook, ch 13
Row 1: sc in the 2nd ch from hook and across the row (12 stitches)
Rows 2-12: sc across
Do not fasten off.

Assembly:
Line up your two squares with the cotton square closest to you.
Ch 1 and single crochet around the edges of the two pieces to join them together. 3sc in each corner to turn. Once you’ve gone the whole way around, fasten off and weave in the end.

It’s that simple!

2018: Year in Review

The good news is that 2018 was an amazing year for me. The bad news is that I didn’t blog about any of it, mostly because 2018 was ridiculously busy. I fully intended to write about crocheting, reading, and traveling, but I accomplished so much that I didn’t have the energy. Here’s a general summary of my year.

Crocheting 
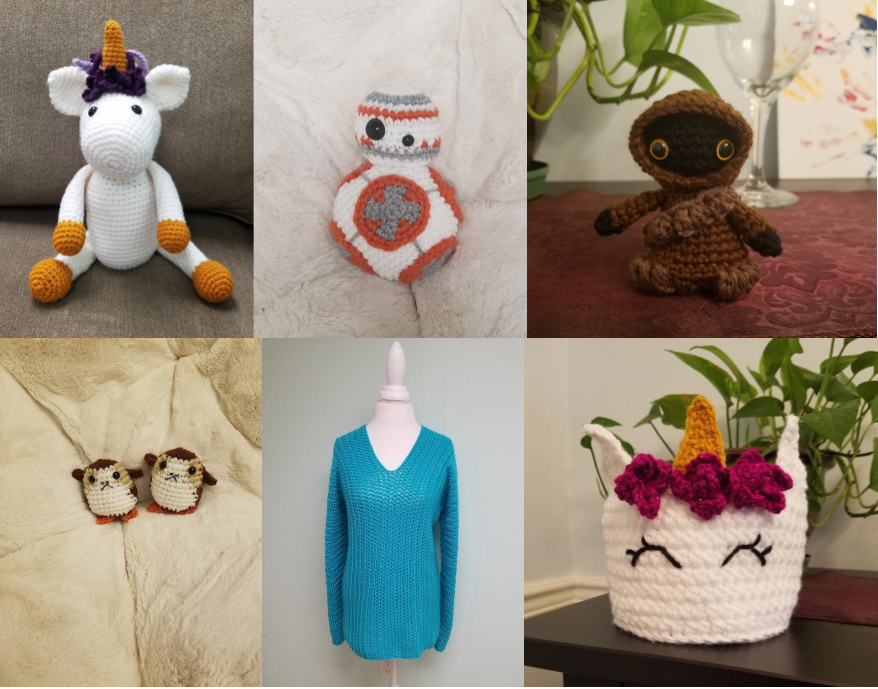
My goal was to complete twenty-four projects, and I exceeded it. Here are a few of my favorite projects from 2018.

Pattern Links: The Friendly Unicorn, BB-8, Jawa, Porgs, Cross My Heart Sweater, Quick and Easy Unicorn Basket

My crocheting goals for 2019 are to finish all my WIPs (I have too many!), use my epic stash of cotton yarn, write down and post the patterns I create, and blog about my crocheting adventures.

Books
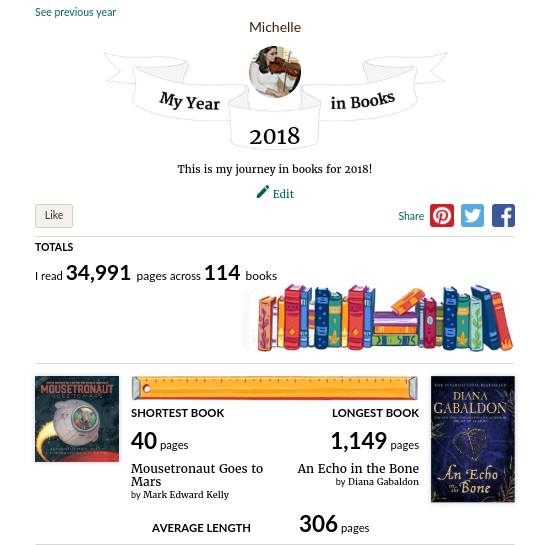
My goal is always to read fifty books in a year, but this year got a little out of control. I find that when I’m stressed and overworked, I gravitate toward very fast, engaging, and light reading. Since I started working on a second Master’s Degree, I’ve been obsessed with fantasy, and I tore through tons of series.

My favorites were A Court of Thorns and Roses by Sarah J. Maas, The Mercy Thompson and Alpha and Omega series by Patricia Briggs, The All Souls Trilogy by Deborah Harkness, The Others Series by Anne Bishop, and The Echo Trilogy by Lindsay Fairleigh. I do not plan to break this record, but it could happen. I may just have to accept that 2018 may remain my high year until I retire.

Travels
If I took the time to go into detail about all of our adventures, this post would be ridiculously long. I’ll just summarize it by saying that our big adventures included Seattle and New York City, which were two of our best! I’ll let the pictures speak for themselves.

NYC Adventure, June 2018
Mt. St Helens, The Space Needle, Mt. Rainier, Snoqualmie Falls, The Museum of Flight

It looks like 2019 will be full of even more adventures than 2018. My goal is to slow down and write about all the amazing things that happen!

HAPPY NEW YEAR!

Darth Vader Corner to Corner Blanket

I’ve noticed that a lot of crocheters have been talking about finally being able to make things for themselves now that the holiday season has ended. I’m right there with them. After a craft show in November and trying to make gifts for the holidays, I decided to treat myself to something epic. I have been talking for a long time about making myself a Darth Vader blanket, and I’ve been intrigued by corner to corner crocheting, so I looked for a pattern and found absolutely nothing. I found this picture on Pinterest, a graph on a site for perler bead patterns, and this post from Ahookamigurumi with tons of amazing Star Wars graphs including the Darth Vader graph from Not All Who Wander are Lost, but nothing for a full sized Darth Vader blanket. Since I couldn’t find exactly what I wanted, I decided to see if I could use the amazing graphs people have shared and my limited math skills to make a full sized blanket. Here are the resources I used:

Stitch Fiddle: I can’t remember where I first read about Stitch Fiddle, but it’s a site for creating graphs for projects. Now that I’ve used it once, I feel like I should play around with it more and write a full review because it has a lot of cool features. It even allows you to upload your own photographs to turn into graphs.

The most difficult part of this process was figuring out how many blocks my grid should be in Stitch Fiddle. I was able to find a couple pins about corner to corner afghan sizing, but my concern was that none of the posts took gauge or hook size into account. My advice is to crochet a few rows with your hook and yarn of choice and see how big your C2C squares turn out to be. Somehow mine ended up being perfect inch squares, which made my life very easy.

This post from The Crochet Crowd has a comprehensive list of afghan and blanket sizes.

This post from Lion Bran Yarn has been so valuable when I need to determine how much yarn I’ll need for projects.

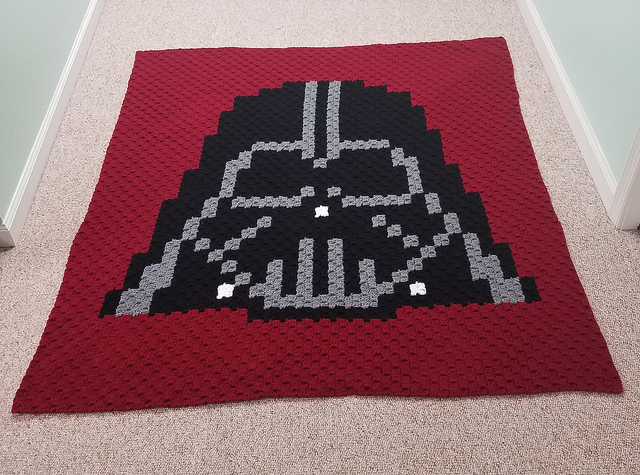
This blanket is the result of all my efforts, and it wasn’t as difficult as I feared!

I’m pretty pleased with how it turned out, especially considering that there was math involved in its creation! It’s exactly the size I wanted (it turned out to be 52″ x 59″) and I calculated the right amount of yarn.

I used the following tutorials to learn corner to corner crochet. Check them out because I’ve learned so much from Jess at Make & Do Crew and Mikey from The Crochet Crowd.

Materials:

  • Approximately 901g of yarn in red
  • Approximately 197g of yarn in grey
  • Approximately 481g of yarn in black
  • Size H 5.0mm hook

I used Caron One Pound in claret, black, and medium grey mix, but I had a lot of black and grey left over. I bought more yarn than I needed just to be safe, but my calculations ended up being correct.

As long as you can do simple math, you can use the tools in Stitch Fiddle to make graphs for afghans in any size you want! You get fifteen graphs with a free account, but you can upgrade to a pro account for more graphs and features. Right now I’m still using the free version, but I may decide to upgrade at some point.

Now I’m hooked (bad pun intended) on corner to corner crochet, and I’m coming up with ideas for more graphs! I’m excited to create some completely original designs to share!

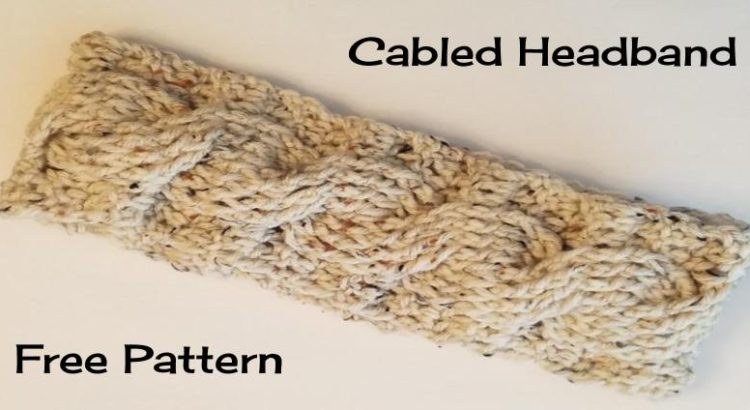
Cabled Headband – Free Pattern

Not too long ago, a friend of mine asked me to make her an earwarmer/headband. Of course, the picture she found was of a knitted headband. I figured I’d be able to find a similar crocheted version, but after scouring Pinterest and Ravelry, I realized that I was out of luck. There were a couple patterns for crocheted cabled headbands, but they looked nothing like what she wanted. I started watching tutorials on how to crochet cables and studied the patterns that were out there, and came up with this! My first pattern.

Cabled Headband

Materials:

  • I/9 5.5MM Hook
  • Worsted Weight Yarn (I used Red Heart Super Saver Aran Fleck)
  • Tapestry Needle

Stitches/Abbreviations:

  • CH: Chain
  • DC: Double Crochet
  • BPDC: Back Post Double Crochet
  • FPDC: Front Post Double Crochet
  • FPTC: Front Post Triple Crochet

Pattern:

Chain 16

Row 1: DC in the 2nd chain from hook and DC across the chain (14 stitches)

Row 2: Chain 2 (counts as first stitch, so it looks like you’re skipping the first stitch), DC in the next two stitches, BPDC in the next 8 stitches, DC in the next 3 stitches. The last stitch will be in the top of the turning chain.

Row 3: Ch 2, DC in the next 2 stitches, Skip four stitches, FPTC around the next four stitches. Go back and FPTC around the skipped four stitches. DC in the last three stitches

Row 4: Ch 2, DC in the next 2 stitches, BPDC around the next 8 stitches, DC in the last three stitches.

*** Rows 3 & 4 can get tricky. This is the tutorial from The Crochet Crowd that I used to help me figure it out!

Row 5: Ch 2, DC in the next 2 stitches, FPDC around the next 8 stitches, DC in the last three stitches.

Row 6: Ch 2, DC in the next 2 stitches, BPDC around the next 8 stitches, DC in the last three stitches.

Repeat rows 3 – 6 until your headband is the desired length. Mine are usually a total of ten cables. I find that the seam looks less noticeable if you end after row 5.

Whip stitch the ends together being careful to match up each stitch, so the seam isn’t too noticeable. (Whip Stitch Seam Tutorial from New Stitch A Day)

Let me know if you see any problems with this pattern. It’s the first I’ve posted!

Click HERE for a printable version!

Feel free to sell what you make from this pattern. All I ask is that if you post anything online, give me some credit/love with a link to the pattern/blog post!