Spring Craft Show: Lessons Learned

My first craft show didn’t go as well as I had hoped it would, but I definitely learned a lot that will help me be more successful next time.

Lesson #1: The time of year matters . . . a lot.

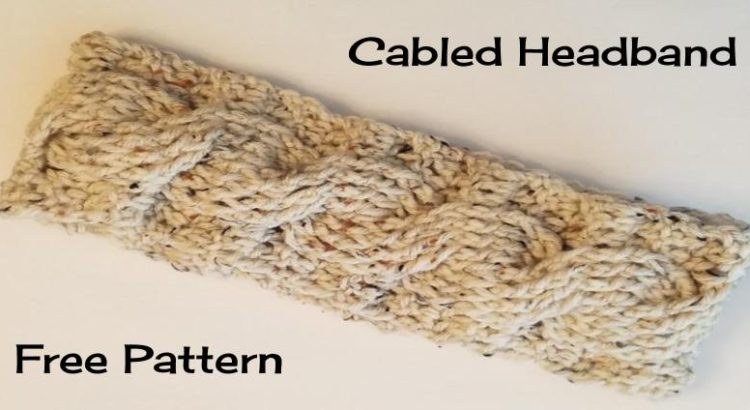
I will probably stick to fall and holiday craft shows from now on. People didn’t seem to be interested in buying crocheted accessories in the spring. I got so many compliments on my headbands, and the friend I was sharing a stand with received tons of compliments on his scarves and fingerless gloves, but no one bought any. Most people were walking around with lawn ornaments and other spring-esque purchases. The only things that sold well were my friend’s amugurami octopi (he sold all five!) and flax-filled heating pads. The other problem is that no one is buying gifts right now, which is probably why I overheard a lot of other crafters commenting on lower sales.

Lesson #2: It’s impossible to predict what people will like and/or buy.

I put some things out on the table that I didn’t think were that impressive, just because we had more room than we anticipated. I got some nice compliments on them, but none on some things that I thought were really cool. I think the key is to have a variety of items, and rotate them to see what sells. You never know what will end up drawing someone in.

Lesson #3: Don’t undervalue your items.

I didn’t get to wander around much, but I saw some crocheted items being sold REALLY cheap. I don’t price my items high. In fact, I’ve been told I should up my prices sometimes, but I’d never sell something at or below cost unless I was desperate to get rid of it. When I was researching craft shows and pricing, I found some great posts about this problem with some good advice on how to price items fairly and make a profit.

There are plenty more posts out there, but I’ve found these to be most helpful. I think my biggest failing was not really knowing my audience, which is going to be an issue since I’m just getting started.

Lesson #4: Don’t give up!

I think I’d be more discouraged if my goal was to make money. My motivation for doing craft shows and selling my creations is to support my yarn-related obsession, make things that make people happy, and keep my house from being overrun by everything I’ve made. This is my hobby and I never want it to feel like a job, because I’ve talked to so many people who’ve had to take a break from something they used to love for that reason. I’m to the point now that I’ve already made pretty much everything I need or want for myself (except this. I NEED THIS!), but I’m not going to stop crocheting. I just need to keep working at making my future craft show endeavors more successful. I’m the kind of person who learns best from experience, so the fact that my first craft show did not live up to my expectations is probably a good thing, because now I’ll be more focused on improving. I already have a lot of cool ideas to share!


Cabled Headband – Free Pattern

Not too long ago, a friend of mine asked me to make her an earwarmer/headband. Of course, the picture she found was of a knitted headband. I figured I’d be able to find a similar crocheted version, but after scouring Pinterest and Ravelry, I realized that I was out of luck. There were a couple patterns for crocheted cabled headbands, but they looked nothing like what she wanted. I started watching tutorials on how to crochet cables and studied the patterns that were out there, and came up with this! My first pattern.

Cabled Headband

Materials:

  • I/9 5.5MM Hook
  • Worsted Weight Yarn (I used Red Heart Super Saver Aran Fleck)
  • Tapestry Needle

Stitches/Abbreviations:

  • CH: Chain
  • DC: Double Crochet
  • BPDC: Back Post Double Crochet
  • FPDC: Front Post Double Crochet
  • FPTC: Front Post Triple Crochet

Pattern:

Chain 16

Row 1: DC in the 2nd chain from hook and DC across the chain (14 stitches)

Row 2: Chain 2 (counts as first stitch, so it looks like you’re skipping the first stitch), DC in the next two stitches, BPDC in the next 8 stitches, DC in the next 3 stitches. The last stitch will be in the top of the turning chain.

Row 3: Ch 2, DC in the next 2 stitches, Skip four stitches, FPTC around the next four stitches. Go back and FPTC around the skipped four stitches. DC in the last three stitches

Row 4: Ch 2, DC in the next 2 stitches, BPDC around the next 8 stitches, DC in the last three stitches.

*** Rows 3 & 4 can get tricky. This is the tutorial from The Crochet Crowd that I used to help me figure it out!

Row 5: Ch 2, DC in the next 2 stitches, FPDC around the next 8 stitches, DC in the last three stitches.

Row 6: Ch 2, DC in the next 2 stitches, BPDC around the next 8 stitches, DC in the last three stitches.

Repeat rows 3 – 6 until your headband is the desired length. Mine are usually a total of ten cables. I find that the seam looks less noticeable if you end after row 5.

Whip stitch the ends together being careful to match up each stitch, so the seam isn’t too noticeable. (Whip Stitch Seam Tutorial from New Stitch A Day)

Let me know if you see any problems with this pattern. It’s the first I’ve posted!

Click HERE for a printable version!

Feel free to sell what you make from this pattern. All I ask is that if you post anything online, give me some credit/love with a link to the pattern/blog post!

Amigurami Tips & Tricks

I have a love/hate relationship with amigurami. I love the finished product, but making them can be incredibly tedious and painstaking. Over the years, I’ve compiled a number of tricks to make my life easier and my finished projects look more polished and professional.

TIP #1: USE THE MAGIC RING TO START YOUR ROUNDS

If you don’t want holes in your critter’s head, NEVER crochet into a chain. Use the magic ring instead. I use this method every time I crochet anything that’s in the round.

WikiHow has great instructions with videos HERE.

TIP #2: MARK YOUR STITCHES VERY CAREFULLY

I have two things working against me when it comes to making amigurami. I’m easily distracted and I can’t count, so I learned (the hard way) that I not only need to use a traditional stitch marker, but I also need to mark the beginning of each round. I do this with a contrasting piece of yarn. This also makes in easier to keep track of the number of rows you’ve crocheted.

TIP #3: STREAMLINE YOUR COLOR CHANGES

I’m a perfectionist, and I hate sloppy color changes. Fortunately, there are some methods to make your color changes smooth and unobtrusive when you’re crocheting in the round.

Here is my favorite tutorial: Oomanoot: The Perfect Color Change

TIP #4: WEIGHT THE BOTTOMS

I don’t like it when my poor little critters fall down, so I’ve started to weight the bottoms of them, when necessary. To do this, I cut a piece of tulle or scrap fabric, fill it with Poly Pellets, and tie it off tightly with a piece of scrap yarn.

Just be careful not to spill the Poly Pellets all over the floor!

TIP #5: HAVE FUN AND BE CREATIVE!

Once you get the hang of making basic body parts, it’s so easy to create your own patterns. Here are two of my own inventions!

I based Batman and Einstein off of patterns and instructions in Creepy Cute Crochet by Christen Haden. It’s one of my favorite pattern books.

I hope these tips are helpful. Let me know of any other ideas in the comments!


Getting Started

I’m slowly, but surely, getting this site under control. I was about to give up on WordPress, but I think I’ll stick it out and see if I can make this work. I may need to try out different themes to see if there’s one that suits me better. For now, I’m going to take the advice I’ve been given and abandon my perfectionism and just get started. Sometimes I feel a little overwhelmed, because it’s been so long since I’ve tried something creative and new, but taking risks is important, and I have very little to lose with this one. Truthfully, just the act of starting this blog, setting up an Etsy store, and creating a Facebook page for everything I’ve crocheted, has made me ridiculously happy, which is more than worth it!

Everything is a learning experience in the end, and sometimes things that don’t turn out the way we planned still have the ability to make us smile.

Finally!

I’ve been talking about starting a blog for a number of years, but I couldn’t figure out what was holding me back. Signing up for my first craft show made everything click. Originally, I intended to write about serious things, but I think that’s what was holding me back. I need fun and creativity in my life, so this will be my space to be me and write about my passions. This will mostly be a crafty blog, but you’ll probably see random posts about music, books, and travel. Oh, and astronauts. LOTS of astronauts.

Enjoy!